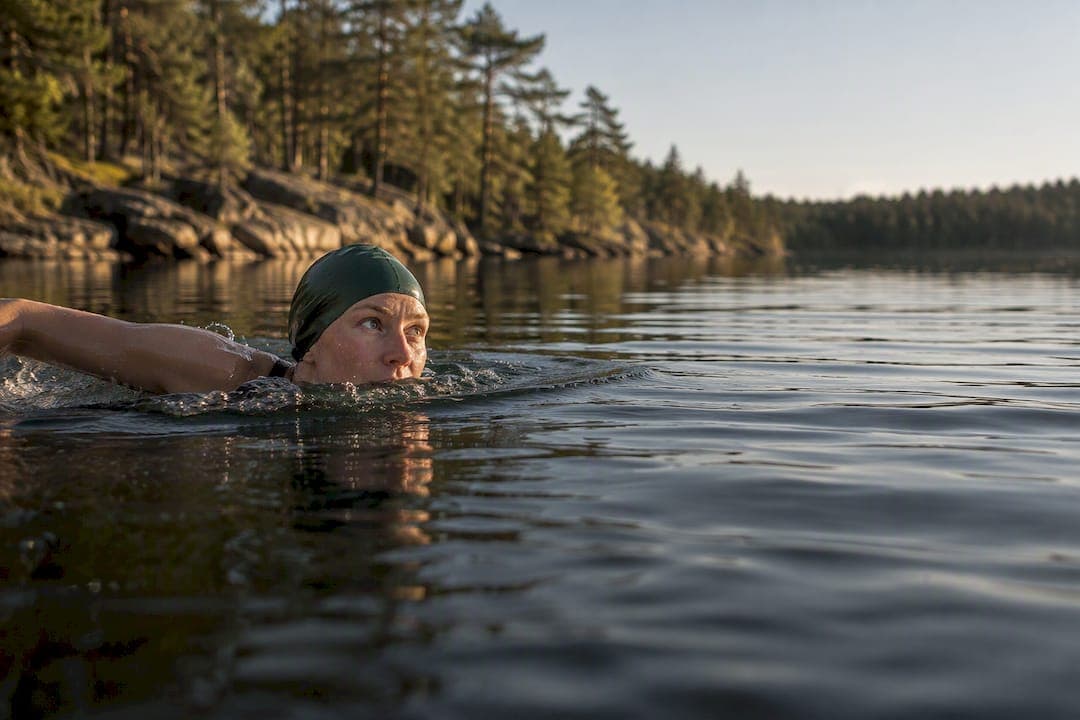
Yes, you can start open water swimming as a beginner, provided you follow a short list of non-negotiable steps. Never swim alone, choose a supervised or well-used bathing spot, wear a bright cap and tow float, and ease into the water slowly to avoid cold shock. Begin with short, shallow swims close to shore, ideally with a companion who knows your plan.
TL;DR:
- Always swim with a companion and inform someone onshore of your route and expected return time to ensure safety in open water.
- Wear a bright swim cap and tow float to increase visibility and provide flotation support during your swim.
- Gradually enter the water to prevent cold water shock, and limit your first sessions to short, comfortable distances below 600 meters.
- Choose a safe, well-marked location away from boat lanes and check for hazards like strong currents, algae, or submerged obstacles before swimming.
- Practice sighting and breathing techniques in a pool to build skills that improve navigation and stability in open water conditions.
Table of Contents
- Essential kit for your first open water swim
- Key safety rules every beginner must follow
- Cold water acclimatisation and avoiding cold water shock
- Sighting, navigation and simple technique changes for open water
- A simple training progression and session plan for beginners
- How to choose and check a safe swim spot
- Packlist: what to bring for a beginner open water session
- Villa Sakis' practical checks before a lake swim
- Basic breathing techniques suited for open water conditions
- Dealing with marine life and environmental hazards
- What to do in an emergency: self-rescue and signalling for help
- A first swim, remembered
- A quiet place to practise your open water skills
- Sources
- FAQ
Essential kit for your first open water swim
The right gear does not make you a stronger swimmer, but it makes the difference between a session that feels manageable and one that feels frightening. For a beginner, a handful of items matter far more than the rest.
A brightly coloured swim cap and a tow float are the two pieces of kit worth buying before anything else. The cap makes you visible to boats, paddleboarders and anyone watching from shore, while the tow float trails behind you on a short leash, doubling as a flotation aid when you need to pause and as a marker that tells others exactly where you are in the water.

Goggles matter more in open water than in a pool, since light behaves differently across open surfaces. A clear or light-tinted lens suits overcast days and early mornings, while a darker or mirrored tint helps on bright afternoons when sunlight bounces off the surface.
A wetsuit is not compulsory, but it changes what a swim feels like. It adds buoyancy, which lifts your legs and makes your position in the water more stable, and it slows heat loss, which matters most in cooler conditions. A well-fitted wetsuit should feel snug at the neck without choking, with no loose fabric pooling water at the shoulders or knees.
A few small extras round out a sensible kit bag:
- Anti-chafe cream for the neck, underarms and inner thighs, applied before you get wet.
- Neoprene socks or gloves if your hands and feet feel the cold before the rest of you does.
- A waterproof phone pouch, useful for calling for help or checking conditions before you get in.
- A warm layer and a hot drink waiting on shore for the moment you climb out.
Pro Tip: Borrow or hire a tow float before buying one. Trying it out first tells you whether the strap length and buoyancy suit your swimming style.
Key safety rules every beginner must follow
Open water forgives fewer mistakes than a pool does, so a short set of habits matters more than any piece of equipment.
- Never swim alone. Choose a lifeguarded spot or swim with at least one other person who can raise the alarm if something goes wrong.
- Tell someone on shore your route and expected return time, and stick to it.
- Wear your tow float throughout the swim. It gives you an immediate place to rest and makes you visible to boats and other swimmers.
- Check the weather, wind direction and any visible current before entering, and steer well clear of boat channels or launch areas.
- Read local signage. Warnings about algae, currents or restricted areas exist because someone has already assessed the risk.
If you start to feel cold, breathless or panicked mid-swim, stop swimming forward and roll onto your back. Floating this way keeps your airway clear while you steady your breathing, and it costs far less energy than treading water. Once you feel calm, call out or wave to whoever is watching from shore, and make your way back at an easy pace rather than sprinting for the exit. Public health guidance on drowning first aid stresses checking a scene for safety and leaning on flotation rather than physical strength when things go wrong, a principle that applies just as much to keeping yourself safe as to helping someone else.
Cold water acclimatisation and avoiding cold water shock
Cold water shock is the body's involuntary reaction to sudden cold: a sharp intake of breath, a racing heart and, for a few seconds, a real loss of control over your breathing. It is most dangerous in the first minute of immersion, which is exactly when a nervous beginner is most likely to panic.
The fix is a slow, deliberate entry rather than a dive or a sudden plunge.
- Wade in gradually and splash water on your neck, chest and face before your shoulders go under.
- Pause once you are chest-deep and wait until your breathing settles into a steady rhythm.
- Treat the first two to three minutes of any swim as an acclimatisation phase, moving gently rather than swimming hard.
- Get out at the first sign of uncontrollable shivering, confusion or numbness that does not ease.
Svensk Simidrott advises caution with outdoor swimming instruction at low water temperatures, and recommends shorter, weather-dependent lesson lengths for open-water sessions. That threshold is a useful personal guide too: below it, keep sessions brief and lean more heavily on a wetsuit.
A wetsuit becomes genuinely advisable once the water sits below the high teens in Celsius. It buys you time by slowing heat loss and adds buoyancy that lifts your hips, which changes your stroke slightly. Expect your kick to feel lazier and your body position higher than in a pool, both of which are normal adjustments rather than signs you are swimming badly.
Sighting, navigation and simple technique changes for open water
Swimming in a straight line without lane markings is a skill in itself, and it is one you can rehearse before you ever get near a lake.
- Lift your eyes briefly every six to eight strokes, keeping your nose and mouth just below the surface, a technique sometimes called alligator eyes.
- Pick a fixed landmark on shore, such as a tree or a building, rather than a buoy, since buoys bob with the water and are harder to track in chop.
- Keep your hips and legs steady as you sight; a quick glance should not cause your whole body to dip or twist.
- Breathe bilaterally where you can, so you can choose whichever side keeps you away from waves or splash.
- If the water is choppy, breathe on the side facing away from the chop to avoid swallowing water mid-stroke.
None of this needs to wait for open water. A pool session is the ideal place to drill sighting: swim a length while lifting your eyes every few strokes to spot a marker at the far end, and practise bilateral breathing until it feels automatic rather than effortful.
Pro Tip: Practise sighting and calm breathing in a pool first. Rehearsing the movement before you need it under pressure builds the habit without the added stress of cold water or waves.
A simple training progression and session plan for beginners
Progress in open water comes from small, repeatable steps rather than one ambitious swim.
Start in water shallow enough to stand in, swimming short loops parallel to the shore rather than heading straight out. This keeps you close to help and lets you practise sighting without the pressure of distance. As your confidence grows, extend the loops gradually, adding a few minutes or metres each session rather than doubling your distance in one go.
A useful benchmark before attempting any open-water distance: be comfortable swimming two to three times that distance in a pool. If you can manage 600 metres indoors without stopping, a 200 to 300 metre open-water swim is a reasonable early goal.
A simple weekly structure for the first month might look like this:
- One session focused purely on cold-water acclimatisation and comfort, staying close to shore.
- One session practising sighting and navigation along a short, familiar loop.
- One pool session building general endurance and bilateral breathing.
Once you are swimming steadily for 15 to 20 minutes without anxiety, a club session or a session with an instructor is worth considering. A qualified instructor will usually assess your stroke, check your sighting technique and give you feedback on pacing that is hard to get on your own.
How to choose and check a safe swim spot
Not every stretch of water is worth swimming in, and a few minutes of checking beforehand avoids most problems.
- Favour lifeguarded or commonly used bathing spots over quiet, unfamiliar shorelines.
- Stay well away from boat lanes, jetties used for launching, and any area marked for watercraft.
- Look for posted water-quality advisories, and treat visibly murky, foamy or discoloured water as a reason to choose somewhere else.
- Check the entry and exit points for a gentle slope, a firm bed and no submerged rocks or debris.
- Make sure you would remain visible to anyone on shore for the whole swim, not just at the start.
- For coastal spots, learn the local tide times and current patterns before getting in.
If you are unsure about any of these, do not go beyond knee-deep water until you have had the spot confirmed as safe by someone who knows it well. Villa Sakis publishes a practical checklist for what to verify before swimming in a lake, which covers many of the same checks in more detail.
Pro Tip: A spot that looks calm from a distance can still have a strong current near a narrow point or outflow. Watch how floating leaves or debris move for thirty seconds before deciding it is safe.

Packlist: what to bring for a beginner open water session
A short, consistent kit list takes the guesswork out of getting ready.
- Bright swim cap and tow float, worn for the whole swim.
- Well-fitted goggles suited to the day's light.
- A large towel and warm, easy-to-put-on clothing for afterwards.
- A hot drink in a flask, ready for the moment you get out.
- Optional extras: wetsuit, neoprene socks or gloves, anti-chafe cream, and a waterproof phone pouch.
A short land warm-up, a few minutes of gentle stretching and arm circles, helps your body adjust before the cold water does the same job more abruptly. Afterwards, dry off and layer up quickly since body heat drops fastest in the minutes right after you exit, even on a warm day.
Villa Sakis' practical checks before a lake swim
Before swimming from the shoreline, it is recommended to check for a clear, gently sloping entry point, observe any weed growth or sudden depth changes near the bank, and be aware of where the nearest help would come from. While not a formal safety course, this habit helps identify obvious potential hazards. For a longer version of these checks, our post on live checks for lake safety covers the same ground with more detail on temperature and timing.
Basic breathing techniques suited for open water conditions
Breathing is the skill most likely to unravel under pressure, which makes it worth practising deliberately rather than leaving to instinct.
Bilateral breathing, alternating which side you breathe on every three strokes, gives you the flexibility to choose calmer water on either side when waves or wind pick up. It also keeps your stroke more balanced, which helps you swim straighter over distance.
In choppy conditions, breathe on the side facing away from the waves so you are less likely to inhale water mid-stroke. If a wave catches you anyway, exhale sharply through your nose and mouth together rather than trying to cough it clear while still swimming.
A calm-breathing drill worth practising on land or in a pool: take four counts to inhale, hold for two, then exhale for six. Repeating this a few times before you get in slows your heart rate and makes the first cold minutes easier to manage. In the water itself, focus on long, controlled exhales rather than short, shallow breaths, since panic tends to shorten your breathing exactly when you need it steady.
Dealing with marine life and environmental hazards
Most encounters with wildlife in open water are harmless, but a little awareness prevents most of the discomfort.
Weed and reeds near the shoreline can feel alarming if they brush against your legs, but they rarely pose a real risk unless they are dense enough to tangle around an ankle. Swimming a little further from the bank, where the water is typically clearer of vegetation, usually solves this.
Small fish and insects on the surface are generally more curious than threatening, and a splash or a change of direction is usually enough to move them along. Submerged rocks, branches or old structures near jetties are a more practical hazard, since they are easy to misjudge in murky water, which is another reason to check entry and exit points visually before swimming there regularly.
Algae blooms are worth taking seriously. Water that looks unusually green, has a strong smell, or carries a visible scum on the surface is a reasonable signal to swim elsewhere, and local advisories usually flag blooms when they appear.
What to do in an emergency: self-rescue and signalling for help
If something goes wrong mid-swim, the first move is almost always the same: stop swimming forward and roll onto your back.
Floating on your back keeps your airway clear without requiring much effort, which buys you time to steady your breathing and think. Once you feel calmer, wave one arm and call out clearly towards the shore or towards any other swimmers nearby, rather than continuing to struggle forward.

If you are helping someone else in difficulty, public health guidance on drowning emergencies is clear that you should keep a floating object between yourself and them rather than allowing them to grab hold of you directly. Pass them your tow float or anything else that floats, and tow them towards shore while staying on your back yourself. Never let a panicking swimmer climb onto you, since it puts both of you at far greater risk.
Afterwards, even if the incident felt minor, warm up properly and mention it to whoever you were swimming with, since a habit of reporting close calls is one of the simplest ways a group stays safer over time.
A first swim, remembered
My first open water swim lasted four minutes and felt like forty. I waded in slowly, splashed my neck until my breathing settled, and swam a short loop parallel to the shore with my float trailing behind me. Halfway round, a gust of wind stirred the surface and I panicked slightly, so I rolled onto my back, floated, and waited for my heart to slow. That small recovery, more than the swim itself, was the moment I felt like I could do this again. Never alone, always visible, always ready to float first and swim second.
— Christian
A quiet place to practise your open water skills
A serene lakeside location with a gentle shoreline suitable for beginners allows for slow wading, complemented by close-by sauna facilities for warming up after swimming. The setting includes space to change and warm areas to dry off, offering an unhurried atmosphere where a short daily swim can become a relaxed part of any visit.

None of this replaces proper instruction or the safety habits covered above, but it offers a calm, private setting to put them into practice at your own pace. If a few restorative days beside still water sound like the right kind of trip, The House has the details you need to plan a stay.
Sources
FAQ
Kan man simma öppet vatten själv?
Swimming alone in open water is best avoided, since help can be minutes away if something goes wrong. A supervised spot or a swimming companion turns a manageable problem into a minor one rather than an emergency.
Vilken utrustning behöver man för att simma i öppet vatten?
A bright swim cap, a tow float and well-fitted goggles cover the essentials for a first swim. A wetsuit is worth adding once the water feels cold, since it slows heat loss and adds useful buoyancy.
Får man fin kropp av att simma?
Regular swimming builds general fitness, endurance and muscle tone across the whole body, much like other consistent aerobic exercise. It is not a shortcut to a specific look, but it is a gentle, low-impact way to stay active.
Hur börjar jag med swimrun?
Start by building comfort and confidence in open water swimming on its own before adding the running and transition elements that swimrun involves. Once short open-water swims feel manageable, look for a local beginner swimrun group or taster session to learn the transitions safely.